Building an HTTP Server From Scratch in C++

Today we will be going on a rather interesting journey. We will be building an HTTP server from scratch using C++ (Just as the title suggests. Weird, right?). I will be doing my best to arm you with all the necessary tools and knowledge you will need to be able to write your server, even if your design varies from the example shown in this demo. 5 + 4 = 9, same as 6 and 3. So go forth and get crazy with it :). The implementation of an HTTP server described here is also language-agnostic; I just happened to choose C++.
Disclaimer: this is not an introduction to C++, but I will be doing my best to break down the code written. So while you won’t need to have prior C++ knowledge to follow along, it’d be easier if you at least understand the basic syntax.
Let’s begin.
What is this “HTTP server”?
HTTP stands for Hypertext Transfer Protocol.
It is a standard for sending and receiving data, be it HTML, JSON, or just plain text over the internet. This definition is simplified - which means it’s just perfect for us. If you want to learn more about HTTP, heading over to MDN is a great place to start.
Now that we have this HTTP term out of the way, an HTTP server is simply a computer that serves data over a network via HTTP. It is the basic building block of a web server (and probably its most important component).

A web client, for example, a web browser, sends an HTTP request to a web server via a network. The web server which is powered by an HTTP server:
- receives this request and processes it
- determines the appropriate response after doing certain checks
- sends this response to the web client.
The response sent by the HTTP server may also include data from files (for example, HTML documents) stored on the webserver.
Now that we’re done with the base introduction — let’s dive right into the design for our server.
High-level design
We will be using TCP (Transmission Control Protocol) to implement our HTTP server. TCP is the most common protocol used for HTTP servers, but there are others — we won’t be talking about them in this article.
Our server will use a TCP/IP socket registered to an IP address on the computer. It will also have a specific port through which the socket will listen for incoming network connections. Network connections that come into our server will be stored on a Queue of network threads. When the Queue is full, incoming network requests will start to fall through. The server will process each network thread synchronously. The network connection will be used to create a temporary socket through which the server reads data from the client and sends data to the client.
In summary, our server will have a socket that:
- listens for incoming network connections and puts them on a Queue
- accepts a network connection from the Queue one at a time
- reads the data (Request) sent from the client over the network connection
- sends data (Response) to the client over the network connection.
Implementation
Alright then, let’s jump right into our code!
I will be discussing the implementation for both Linux and Windows platforms as I go on. The difference between the two implementations lies in the behaviour of the system APIs available. For socket programming in Linux, I’ll be using the “Sys/socket” and “Arpa/inet” libraries. In Windows, I’ll be using the “Winsock” library as an alternative.
You can head over to the GitHub repository if you would like to inspect the code as you follow along.
OOP design
The TcpServer class will be a layer of abstraction for all of our server code. Before we get into some of the names I have chosen for the classes, methods, etc., let us just go over one of my favourite quotes;
There are only two hard things in Computer Science: cache invalidation and naming things.
— Phil Karlton
Our starter files
We will be creating three main files for our code:
http_tcpServer_linux.hhttp_tcpServer_linux.cppserver_linux.cpp
Note: I will be using the Linux version of the code as a main point of reference. If you are following along with the windows version, I will let you know when we get to parts that differ.
The http_tcpServer_linux.h and http_tcpServer_linux.cpp files will hold the code for our actual server implementation via the TcpServer class. Server_linux.cpp will have a “main” function through which will run the server using the TcpServer object.
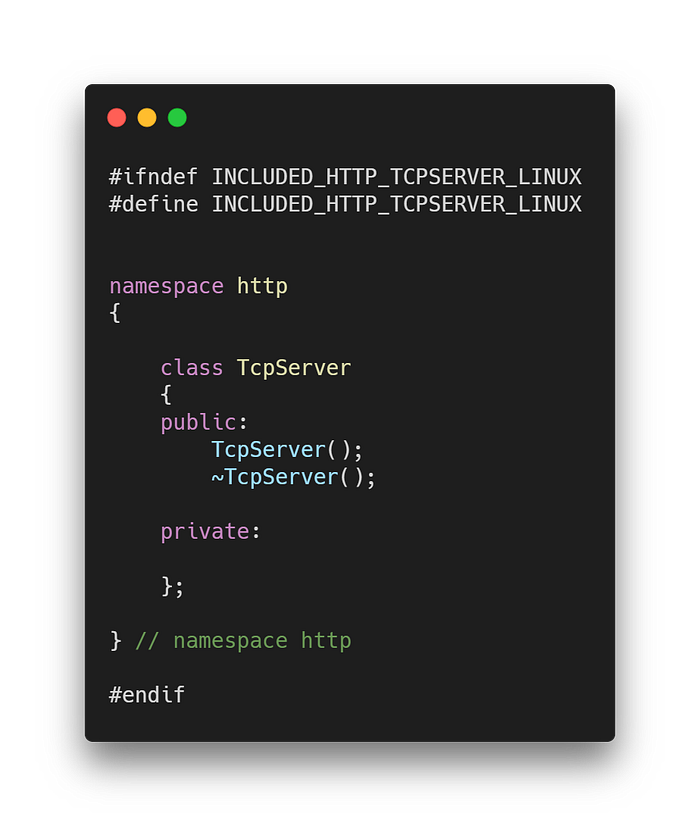
We will declare our TcpServer class and its constructor and destructor methods in http_tcpServer_linux.h.
#ifndef INCLUDED_HTTP_TCPSERVER_LINUX
#define INCLUDED_HTTP_TCPSERVER_LINUX
namespace http
{    class TcpServer
    {
    public:
        TcpServer();
        ~TcpServer();    private:

    };} // namespace http#endif
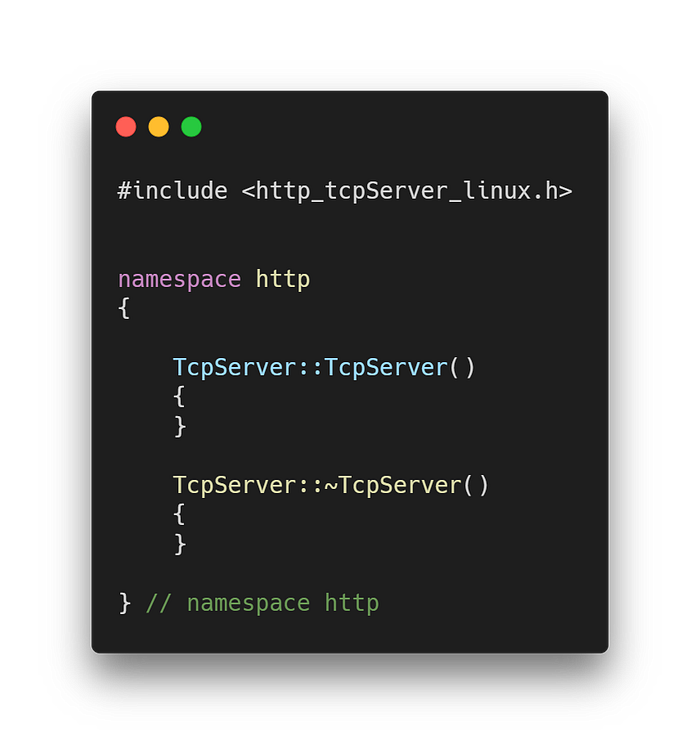
Then we will write definitions for the constructor and destructor methods in http_tcpServer_linux.cpp.
#include <http_tcpServer_linux.h>
namespace http
{    TcpServer::TcpServer()
    {
    }    TcpServer::~TcpServer()
    {
    }} // namespace http
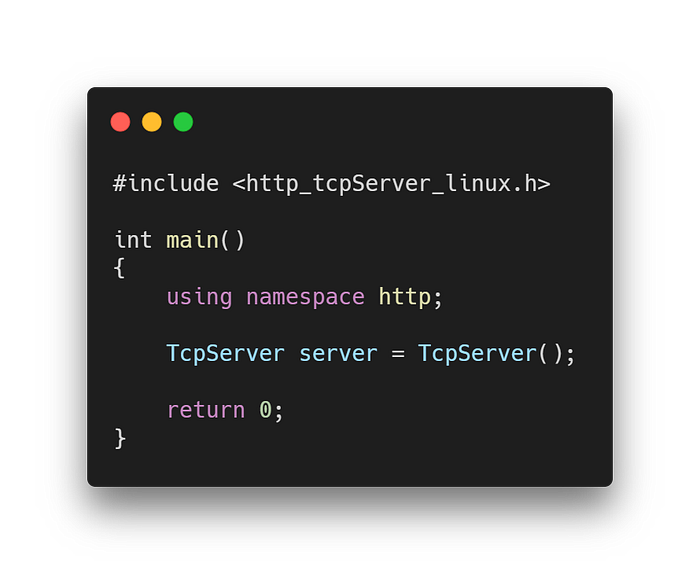
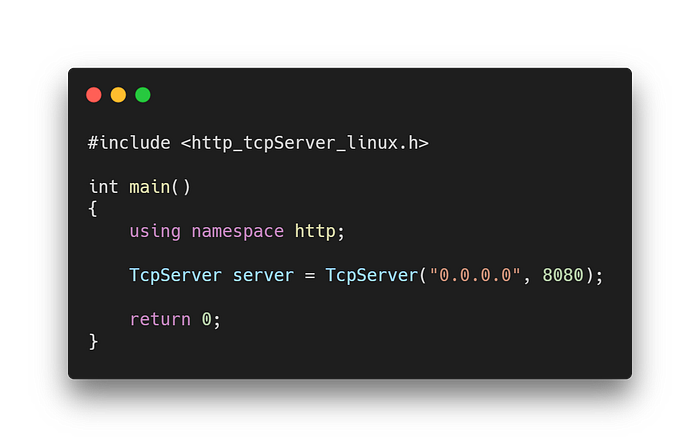
Finally, in server_linux.cpp, we will be adding our “main” function.
#include <http_tcpServer_linux.h>int main()
{
    using namespace http;    TcpServer server = TcpServer();    return 0;
}
This is what our files look like at the moment:
Creating a TCP/IP socket
To create a TCP socket we will be using the “socket” system API. The socket API takes three parameters and is called as seen below:
int socket(int domain, int type, int protocol);The windows version is more or less the same. From the definition, it returns a SOCKET type - which is a type definition for an unsigned integer (you can learn more about signed and unsigned integers here).
SOCKET socket(int domain, int type, int protocol);domain
This argument specifies the communication domain. It represents the protocol family that the socket will belong to. For a TCP/IP socket, we will be using the IPv4 Internet protocols defined by the AF_INET domain.
type
This argument describes the type of communication structure the socket will allow for this protocol family. We will be using SOCK_STREAM - to allow for reliable, full-duplex byte streams.
protocol
This specifies the particular protocol the socket will use from the given family of protocols that support the chosen type of communication. For the AF_INET family, there is only one protocol that supports SOCK_STREAM. We will be setting this parameter to 0.
In our code, we will create a socket for our member variable, m_socket, like so:
m_socket = socket(AF_INET, SOCK_STREAM, 0);You can learn more about this API by checking the Linux man-pages.
For windows, before a process can call the socket function, it needs to call the WSAStartup function. WSAStartup allows a program to specify the version of Windows Sockets required and retrieves details of the specific Windows Sockets implementation. The definition for the function is as follows :
int WSAStartup(WORD wVersionRequested,LPWSADATA lpWSAData);We will be specifying a version of 2.0 and saving the WSAData in a member variable created specifically for our windows implementation — m_wsaData.
WSAStartup(MAKEWORD(2, 0), &m_wsaData);We will wrap the code for creating our socket in a function called startServer(). This function will be called in our TcpServer class constructor.
//Linux
int TcpServer::startServer()
{
m_socket = socket(AF_INET, SOCK_STREAM, 0);
if (m_socket < 0)
{
exitWithError("Cannot create socket");
return 1;
} return 0;
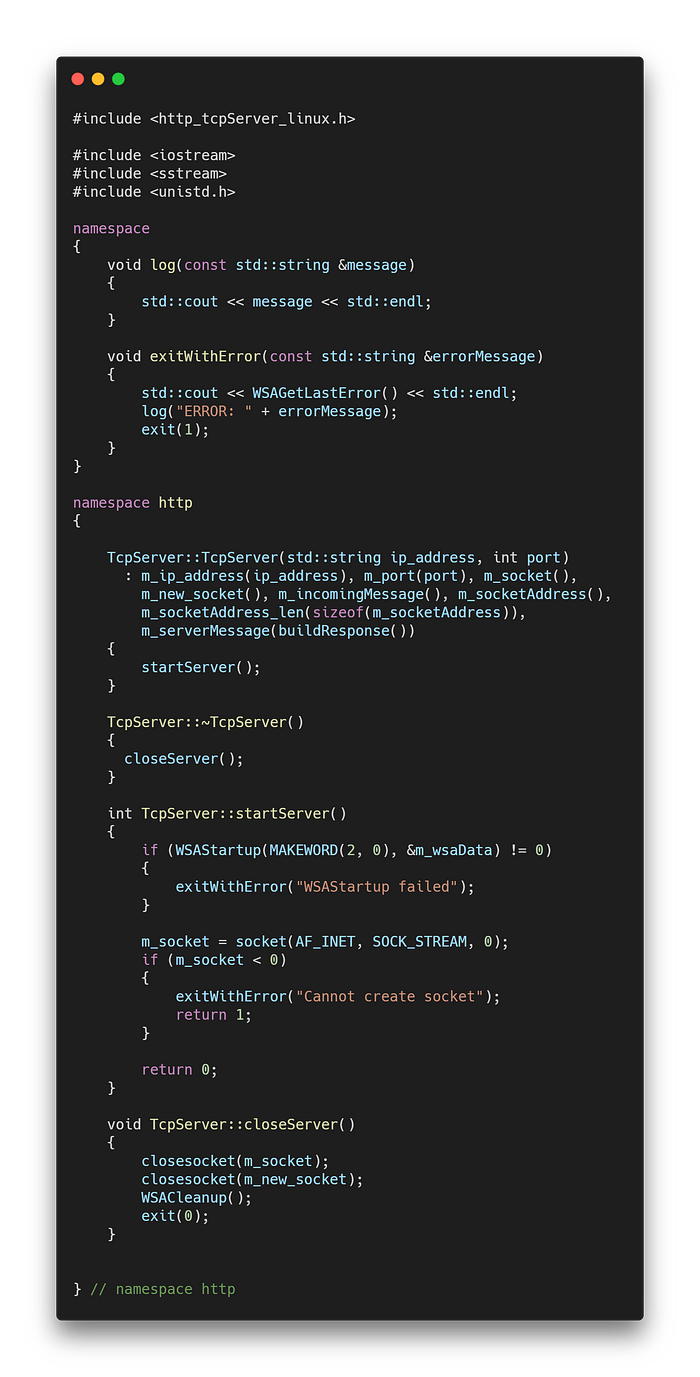
}//Windows
int TcpServer::startServer()
{
if (WSAStartup(MAKEWORD(2, 0), &m_wsaData) != 0)
{
exitWithError("WSAStartup failed");
} m_socket = socket(AF_INET, SOCK_STREAM, 0);
if (m_socket < 0)
{
exitWithError("Cannot create socket");
return 1;
} return 0;
}
Closing a socket
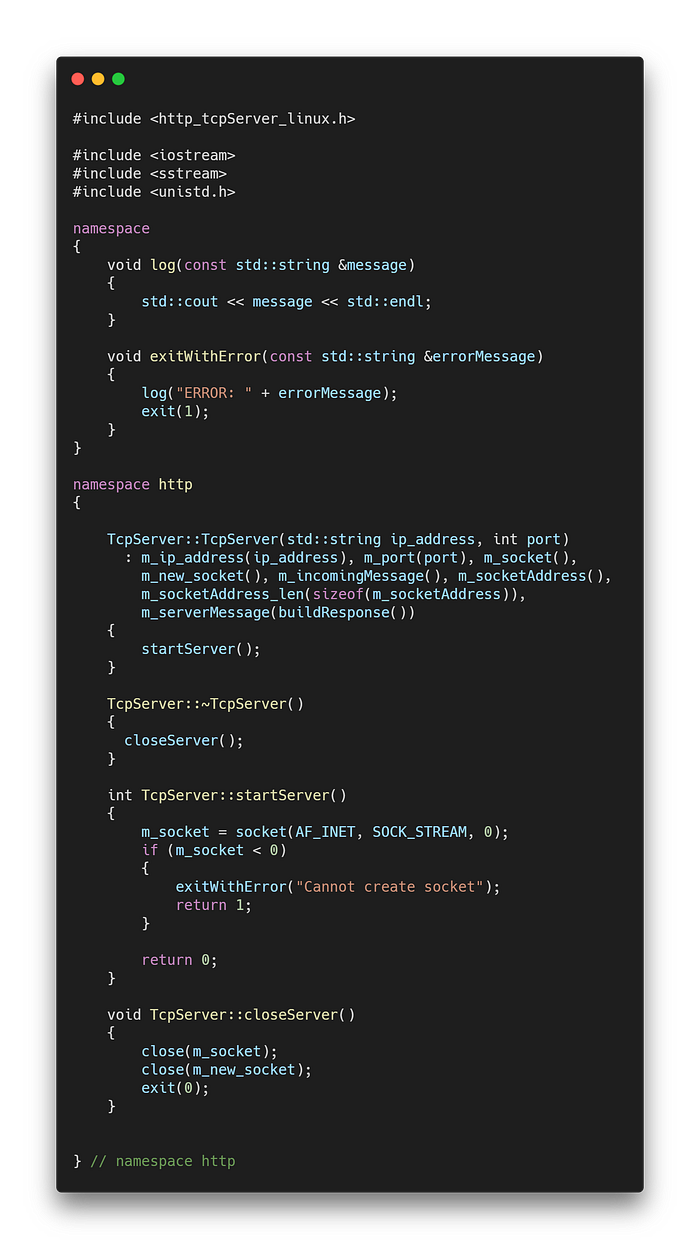
When our TcpServer gets cleaned up (the destructor function, ~TcpServer() , is called) we want to make sure we also close the socket we’ve created for our server. It is good practice to remember to clean up after yourself, especially when system resources can be freed up. On Linux, we can do this using the close() system call. We use the closesocket() function on windows. We will also need to call the WSACleanup() function for the Windows version. This function terminates all Windows socket operations on all threads for the program.
We will also be wrapping up this piece of code in a function called closeServer() for the TcpServer class. This will be invoked in the destructor for our class.
//Linux
void TcpServer::closeServer()
    {
        close(m_socket);
        close(m_new_socket);
        exit(0);
    }//Windows
void TcpServer::closeServer()
    {
        closesocket(m_socket);
        closesocket(m_new_socket);
        WSACleanup();
        exit(0);
    }
Logging and error handling
This can be done in a myriad of ways. I have taken the lazy approach and created:
log()- for reading out log messages to standard outexitWithError()- for logging an error message and exiting the process.
In windows, you can retrieve the last error message associated with your socket threads with the WSAGetLastError() function.
//Linux
void log(const std::string &message)
    {
        std::cout << message << std::endl;
    }void exitWithError(const std::string &errorMessage)
    {
        log("ERROR: " + errorMessage);
        exit(1);
    }//Windows
void log(const std::string &message)
    {
        std::cout << message << std::endl;
    }void exitWithError(const std::string &errorMessage)
    {
        std::cout << WSAGetLastError() << std::endl;
        log("ERROR: " + errorMessage);
        exit(1);
    }
This is what our files look like so far:
The following files are slightly different in the Windows version:
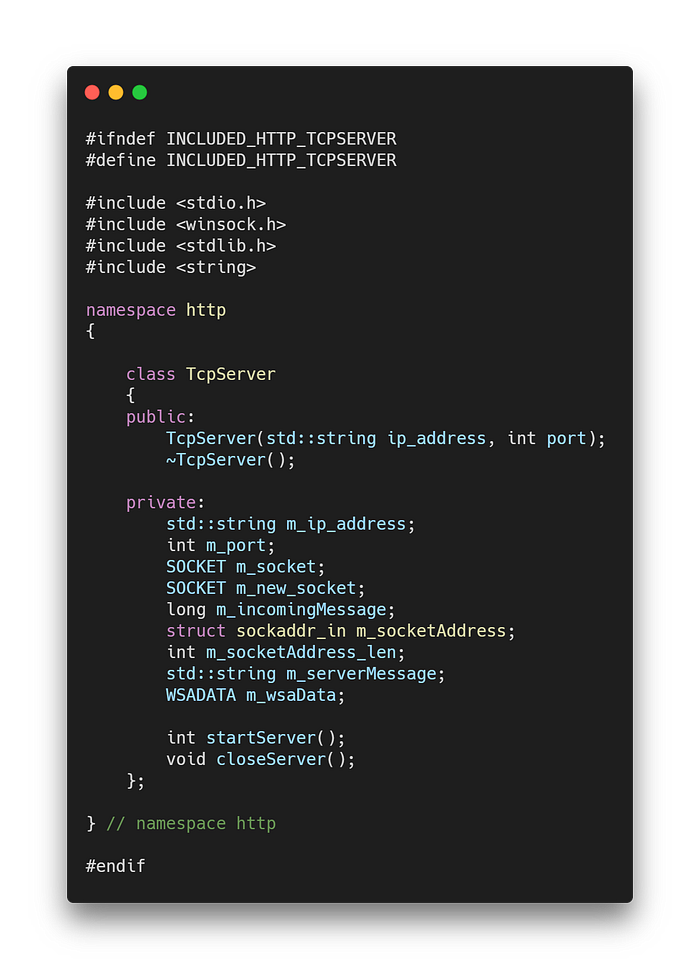
Naming the socket
This involves assigning the socket to an IP address and a port.
In this step, a socket address is defined using the sockaddr_in structure. This address is then attached to our socket. With this, whenever a client tries to connect to our server, they will know what address to send their network request to.
struct sockaddr_in {
    short            sin_family;   // e.g. AF_INET
    unsigned short   sin_port;     // e.g. htons(8080)
    struct in_addr   sin_addr;     // see struct in_addr, below
    char             sin_zero[8];  // zero this if you want to
};struct in_addr {
    unsigned long s_addr;
};
sin_family
This is the socket family. In our case, that is AF_INET.
sin_port
The port to be used by our server. There are a couple of reserved ports and TCP/IP servers typically use port 80, but we will use 8080 in our code. We will need to call htons() to ensure that the port is stored in network byte order.
sin_addr
This is the IP address we will be using for the server. There are a few usually a couple of IP addresses available per network interface for your machine (usually one or two of them). We will be using 0.0.0.0 which is a default IP address that lets the operating system choose anyone it wants. The member variable sin_addr holds the IP address, in network byte order, as an unsigned long. We will be using the inet_addr() function to convert the IP address from a char * to an unsigned long and have it stored in network byte order.
sin_zero
This member variable has no “real” utility in the sockaddr_in structure. It is a buffer used to adjust the size of the sockaddr_in in cases where you need to cast it to a sockaddr type. The sockaddr type is larger than the sockaddr_in type, so the sin_zero is used to make up the difference when the need to be interchanged. It’s not very relevant for our present architecture, so it can be left as is. It is however common practice to zero-out the bytes in this field when not used.
The bind() function is used to tie a socket address to a given socket.
int bind(int sock, const struct sockaddr *addr, socklen_t addrlen);The first argument is the socket, the second argument is the socket address, and the third is the length of the socket address object.
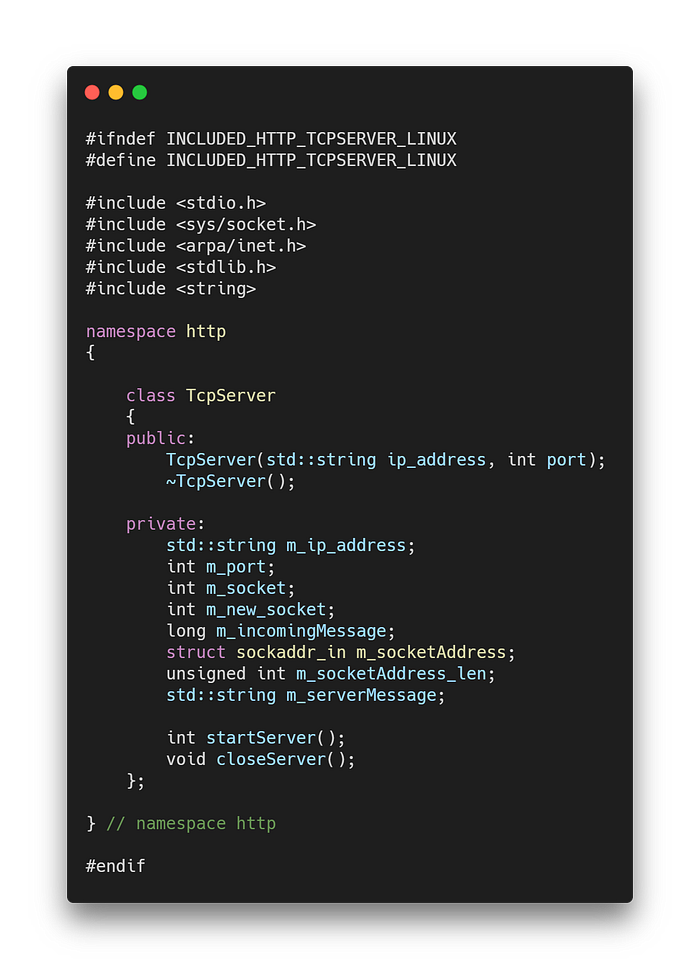
When we initialise the member variables in the constructor of our TcpServer class, we will also configure the socket address object in m_socketAddress.
m_socketAddress.sin_family = AF_INET;
m_socketAddress.sin_port = htons(m_port);
m_socketAddress.sin_addr.s_addr = inet_addr(m_ip_address.c_str());
The code to bind the socket to the socket address is put in the startServer method.
if (bind(m_socket,(sockaddr *)&m_socketAddress, m_socketAddress_len) < 0)
{
    exitWithError("Cannot connect socket to address");
    return 1;
}
Listening and queueing
This step involves listening for incoming connections on our socket address. We can use the listen() system call to collect incoming connections on a queue.
int listen(int sockfd, int backlog);The first argument is the socket. The second argument is the maximum number of connection threads we want to be able to hold at once. If a client tries to connect when the queue is full, they will get rejected by the server.
The code for listening will be put in a method of the TcpServer class called startListen() .
void TcpServer::startListen()
{
    if (listen(m_socket, 20) < 0)
    {
        exitWithError("Socket listen failed");
    }    std::ostringstream ss;
    ss << "\n*** Listening on ADDRESS: "
        << inet_ntoa(m_socketAddress.sin_addr)
        << " PORT: " << ntohs(m_socketAddress.sin_port)
        << " ***\n\n";
    log(ss.str());
}
Accepting connections
The accept() system call is used to process each connection thread in the queue created by listen() . It does this by creating a new socket with a connection thread, which can be used to receive and send data between the client and the server.
int accept(
    int sockfd,
    struct sockaddr *restrict addr,
    socklen_t *restrict addrlen
);
The first argument is the server’s socket, the second is a pointer to a socket address and the third is the length of the address object passed prior. Accept() returns the new peer socket and writes the socket address information into the socket address pointer passed in as the second argument.
In our code, we will be reusing m_socketAddress for the accept() function since we no longer have any need for the server address that was stored there previously. We will also be wrapping the code for accepting connections in a method called acceptConnection()
void TcpServer::acceptConnection(SOCKET &new_socket)
{
    new_socket = accept(m_socket, (sockaddr *)&m_socketAddress,
                        &m_socketAddress_len);
    if (new_socket < 0)
    {
        std::ostringstream ss;
        ss <<
        "Server failed to accept incoming connection from ADDRESS: "
        << inet_ntoa(m_socketAddress.sin_addr) << "; PORT: "
        << ntohs(m_socketAddress.sin_port);
        exitWithError(ss.str());
    }
}
Reading the request
A buffer is used to store the data transmitted in the request over the connection to the server. In the Linux version, the read() system call is used to read the bytes onto the buffer. In the Windows version, since read() is a POSIX I/O system call— which isn’t directly available on Windows — the recv() function is used instead.
ssize_t read(int fd, void *buf, size_t count);int recv(
  [in]  SOCKET s,
  [out] char   *buf,
  [in]  int    len,
  [in]  int    flags
);
read() accepts a file descriptor which will be the socket in our case(since everything in Linux is always a file haha), a buffer to store the bytes from the socket and a count that specifies the number of bytes to be read.
recv() accepts very similar arguments to read() with the only addition being an integer argument called a flag. This flag argument specifies the desired behaviour of the function; for our use-case, we’ll set it to 0.
I set BUFFER_SIZE to 30720 just to be extra sure the buffer is large enough to read all the incoming bytes from the connection.
const int BUFFER_SIZE = 30720;//Linux versionchar buffer[BUFFER_SIZE] = {0};
bytesReceived = read(m_new_socket, buffer, BUFFER_SIZE);
if (bytesReceived < 0)
{
    exitWithError("Failed to read bytes from client socket connection");
}//Windows versionchar buffer[BUFFER_SIZE] = {0};
bytesReceived = recv(m_new_socket, buffer, BUFFER_SIZE, 0);
if (bytesReceived < 0)
{
    exitWithError("Failed to receive bytes from client socket connection");
}
Sending a response
The response data — which is a C-style string — is returned to the client via the socket connection using the write() system call. Similar to read() above, write() isn’t available on the Windows OS, so send() is used in its stead.
The functions take in the socket object, the message data as well as the size of the message data and write the data to the socket so the client receives a response on their end of the connection.
ssize_t write(int fd, const void *buf, size_t count);int WSAAPI send(
  [in] SOCKET     s,
  [in] const char *buf,
  [in] int        len,
  [in] int        flags
);//Linux versionlong bytesSent;bytesSent = write(m_new_socket, m_serverMessage.c_str(), m_serverMessage.size());if (bytesSent == m_serverMessage.size())
{
    log("------ Server Response sent to client ------\n\n");
}
else
{
    log("Error sending response to client");
}//Windows versionint bytesSent;
long totalBytesSent = 0;while (totalBytesSent < m_serverMessage.size())
{
    bytesSent = send(m_new_socket, m_serverMessage.c_str(), m_serverMessage.size(), 0);
    if (bytesSent < 0)
    {
        break;
    }
    totalBytesSent += bytesSent;
}if (totalBytesSent == m_serverMessage.size())
{
    log("------ Server Response sent to client ------\n\n");
}
else
{
    log("Error sending response to client.");
}
Conclusion
That is most of what you need to know to build a simple HTTP server from scratch (for both Linux and Windows operating systems). It is again noted that this project was done purely for educational purposes. Ideally, you shouldn’t need to create a server for use in your enterprise code. There’s a lot of things that go into keeping your server secure that hasn’t been spoken about here (server security is a topic as broad as they come haha). You will be better of using an already implemented server in whatever language you are programming with.
You can visit the GitHub repository (if you haven’t already done so) to see the final state of the CPP files.